Safety Considerations

  • Please follow the instructions in the “Wiring Diagram” of the manual for wiring.
  • This heater must be grounded.
  • Avoid use in high humidity to avoid reducing the service life of the parts.
  • The heater has heat generating and arcing or sparking parts inside.

  • Do not use where petrol, paint or flflammable vapours or liquids are used or stored.

Installation work and electrical wiring must be done by a qualifified person(s) in accordance with all applicable codes and standards, including fifire-rated construction codes and standards.

How to Install?

1

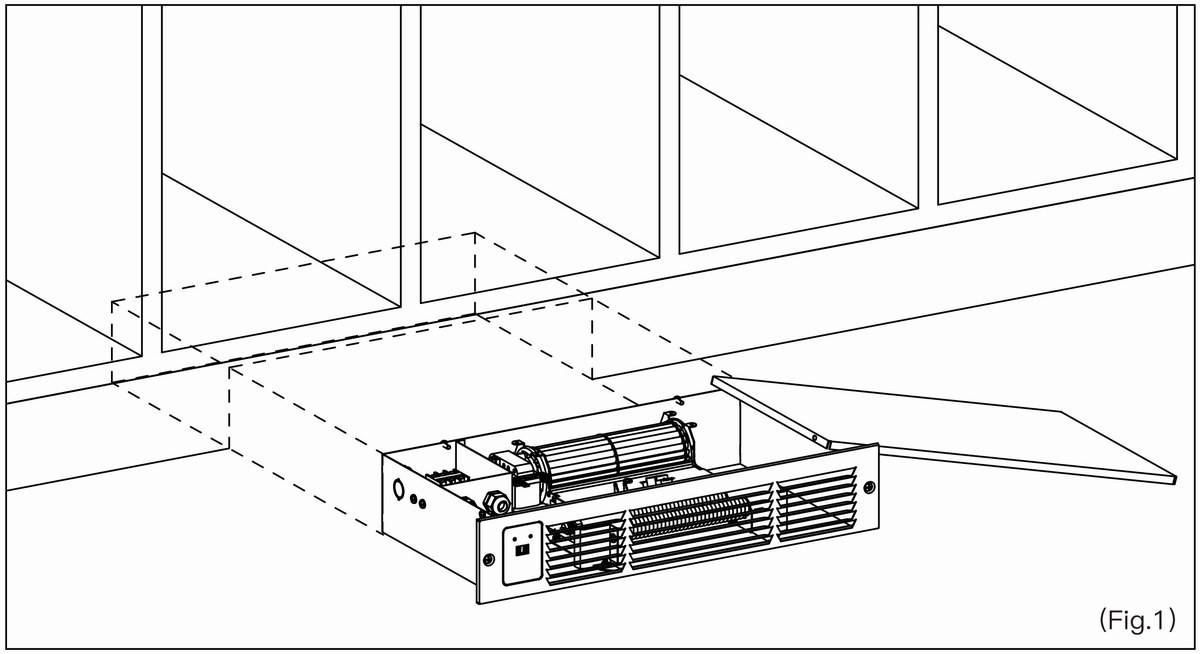
Step 1: Cut a 18 ⅕" x 3 ⅔" (463 x 93 mm) opening in the location to be installed, keeping the clearance area clear of obstructions, remove the cover from the heater housing, and remove the screws from the cover. (Fig.1)

Step 2: Determine which opening in the housing will be used for fifield wiring and remove (requires own clip-on cable connector, size: 3/8″), then install the clip-on cable connector. (Fig.2)

2

3

4

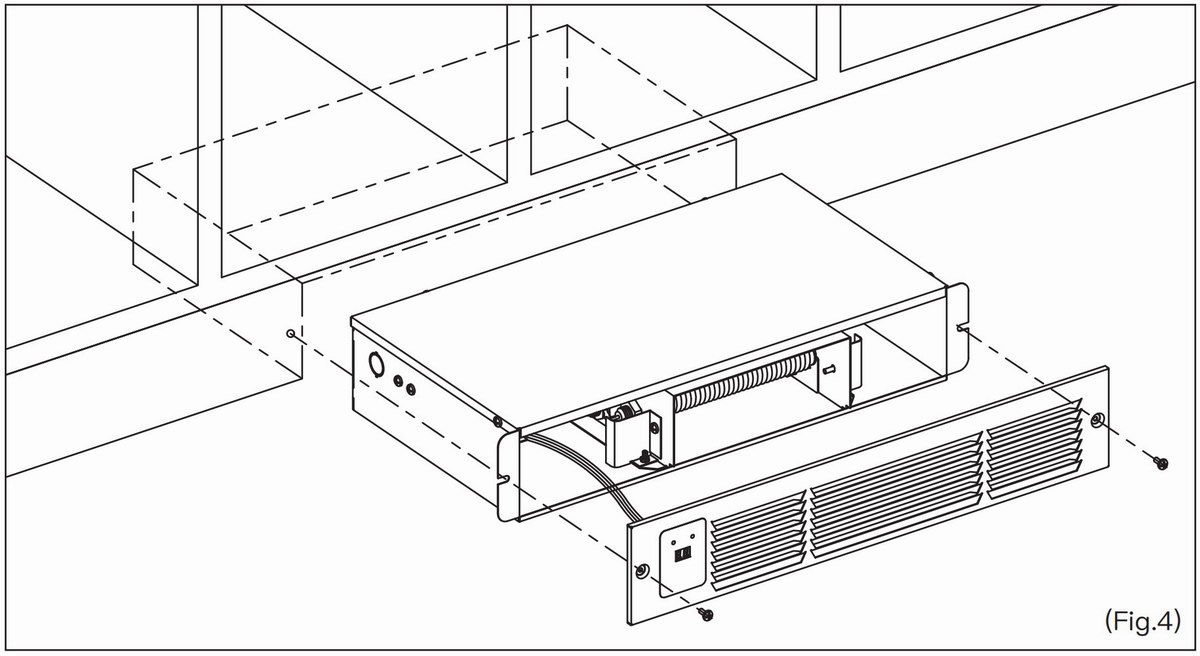
Step 4: After making sure that all the wiring is connected correctly and stable, cover the lid, do not put it into the opening first, power on the heater to test whether it will start running normally, if it runs normally, please immediately power off, then put the heater into the opening and lock the included screws against the holes. (Fig.4)

Step 3: Route the field wiring
through the clip-on cable
connector, leaving 3″ (76mm) ofwire inside the junction box and into the heater’s terminal strip. 

Note: be sure to ground, and route your fire wire(L) into correspondence with the black wire, your zero wire(N) into correspondence with the white
wire, and your ground wire into correspondence with the green wire. (Fig.3)

Maintenance

For correct and consistently safe operation your heater must be inspected and cleaned regularly, depending on the application(It is recommended that the heater should be inspected and cleaned at least once a year). If used as a primary heat source, the heater should be inspected and cleaned at least once a year, or more if necessary. This heater has a built-in thermostat. Switch offff the power to the service entrance before cleaning or servicing.

This heater is permanently lubricated and never needs oiling ordisassembly. The following maintenance and cleaning tasks can be performedby the user. All other servicing must be performed by an authorizedtechnician If you have any questions, please consult with our cus.tomer service department.

(www.airepush.com/warranty; [email protected])

Cleaning

  1. Disconnecting the power at the main service panel;
  2. Ensure that the heating element is cool;
  3. Remove the screws and grills;
  4. Slide the heater and back box out;
  5. Remove the top of the housing;
  6. Clean the inside of the blower and heater with a vacuum cleaner with a brush attachment;
  1. Carefully rotate the blower wheel with your fifingers to make sure it turns freely. If you fifind any problems, stop using the heater until it is repaired;
  1. Replace the cover;
  2. Push the heater back into place;
  3. Secure the grille and heater with screws;
  4. Reconnect the power supply;
  5. Verify that the heater is operating properly.

NOTE: Metal and electrical parts should never be immersed in water.